The drum kit is arguably the hardest instrument to mic because it is really several instruments together. Drums are also a very important instrument to record well for many types of music because they provide the drive that moves the song forward. It is a good idea to allow plenty of time in a session for experimenting with mic placement on the drum kit.
The importance of properly tuning the drums before recording is often underestimated, but the effect can be significant. The tuning of the drum will affect its pitch, sustain, and tone. Additionally, poorly tuned drums often have a high-pitched ringing sound that follows the note, which is difficult to get rid of in a recording.
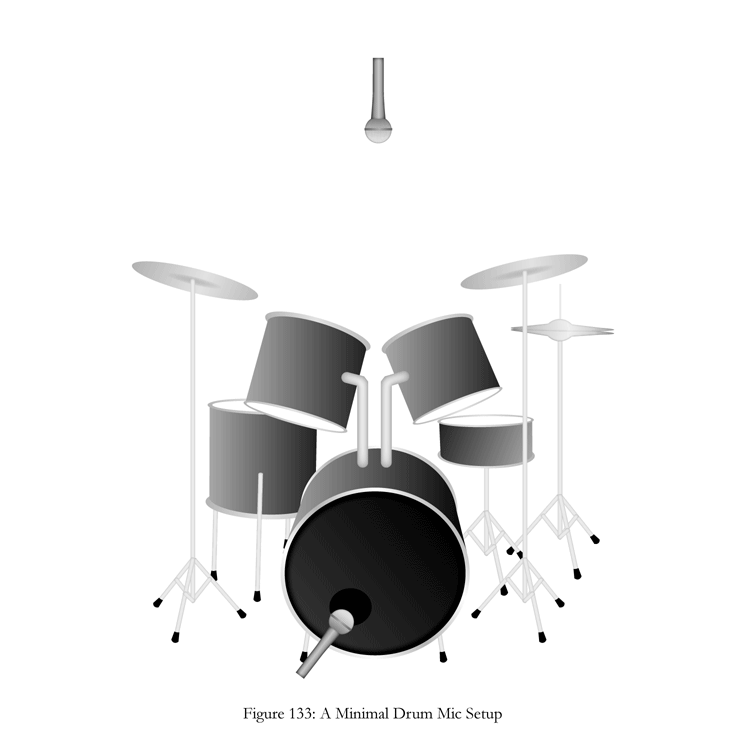
The best approach for miking drums will depend greatly on the style of music and the tone you are looking to achieve. In softer styles, such as jazz, a somewhat minimal setup is generally used that involves a mic, or pair of mics, placed above the kit (referred to as “overheads”) that are responsible for picking up most of the kit. This is usually reinforced by a mic on the kick drum and possibly the snare (see Fig. 133).
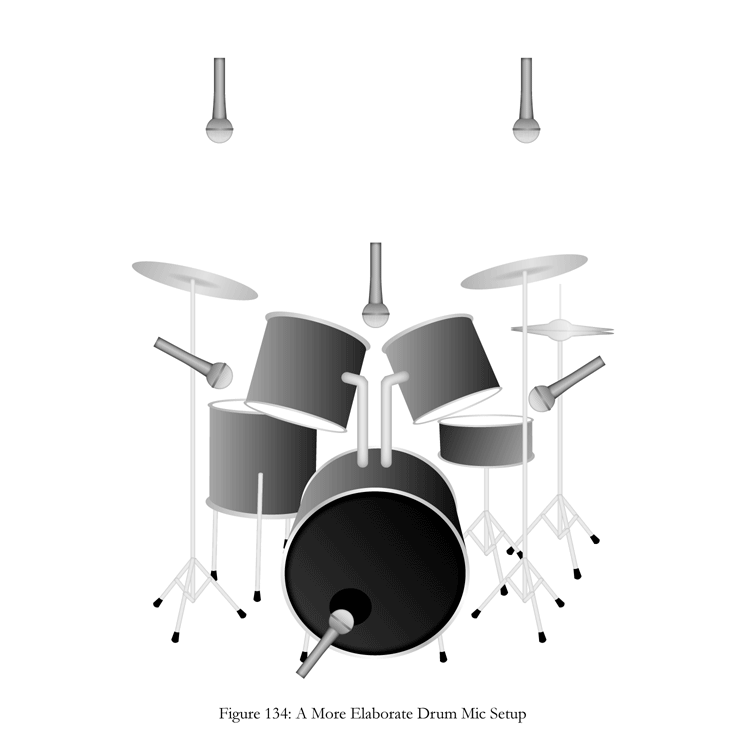
For heavier styles, like rock, it is more common to mic each piece of the kit individually with “close mics”. In this setup, the overheads are used to pick up the cymbals, to add some “air” to the tone of the kit, and to fill out its tone (see Fig. 134). Below we’ll look at some common placements for the individual pieces of the drum kit.
Kick Drum
Because of the huge amount of sound pressure being created by the kick drum, it is important to use a mic with a high SPL rating. By far, the most common mic to use is a wide-diaphragm dynamic mic, though some condenser mics are rugged enough to handle a kick drum. The mic also needs to have a good low-frequency response, particularly when recording heavier styles of music.
Placement options for a kick drum mic include:
- 1–2″ outside the hole in the resonant head, or from the head itself if there is no hole.
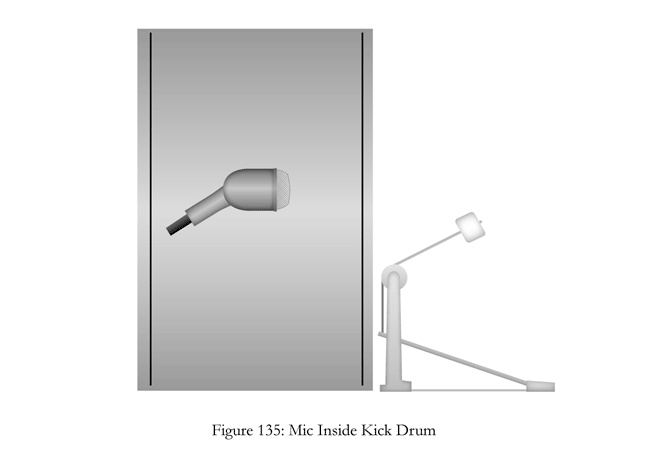
- Inside the drum at a distance of 2–3″, pointed at the spot where the beater makes contact with the batter head (see Fig. 135).
- Below the drum throne, pointed at the spot where the beater makes contact with the batter head.
Another interesting technique that is quite popular is making a drum mic from an old speaker. This is traditionally done with the woofer from a Yamaha NS-10 monitor, though any woofer will work. Results will vary from one speaker to the next. The speaker is removed from its cabinet, wired to a mic cable, and mounted to a stand placed 1–2″ from the resonant head of the kick drum. This generally results in a signal with plenty of low end thump. There are many ways to build such a mic, and there are plans readily available on the internet.
Low-end thump can be added to an existing recording by playing the kick drum track through a subwoofer, then miking the subwoofer and recording it onto a separate track. The recorded subwoofer track then has a low-pass filter placed on it and is blended with the original kick drum track.
Snare Drum
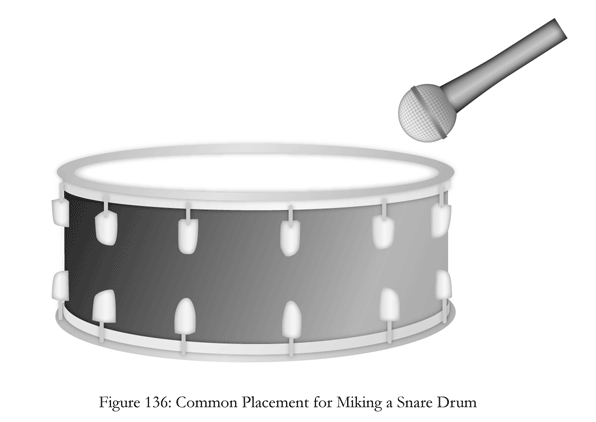
Snare drums are commonly miked with a cardioid or hyper-cardioid dynamic microphone. Common placement is to place the mic slightly above (approximately 1″) and inside the rim of the drum pointing towards the drum head at an angle of approximately 30–60˚ (see Fig. 136). Care needs to be taken to place the mic where it won’t receive any blows from errant drumsticks, and it is usually a good idea to place it so the hi-hat is in the pickup pattern’s angle of most rejection.
It is also common to use the same placement on the bottom skin of the snare drum to pick up more of the sizzle of the snares. Miking both the top and bottom skins will allow flexibility when mixing. It’s important to note that the signal from the bottom head will usually be 180˚ out-of-phase with the mic on top and the overheads, in which case it is necessary to reverse the phase of the bottom mic signal.
Toms
Toms are usually miked with a cardioid or hyper-cardioid dynamic mic. On larger toms, a mic should be used that is fairly sensitive in lower frequencies. When miking toms individually, the mic is usually placed 1–2″ from the skin, just inside the rim. As with all drums, care should be taken to avoid the possibility of the mic being struck by the drumsticks.
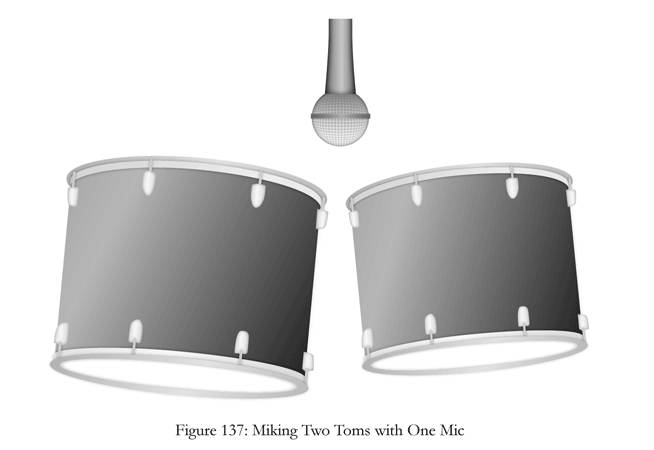
More than one tom can be picked up with the same mic by placing a cardioid or bi-directional microphone above and between them (see Fig. 137).
Hi-Hat
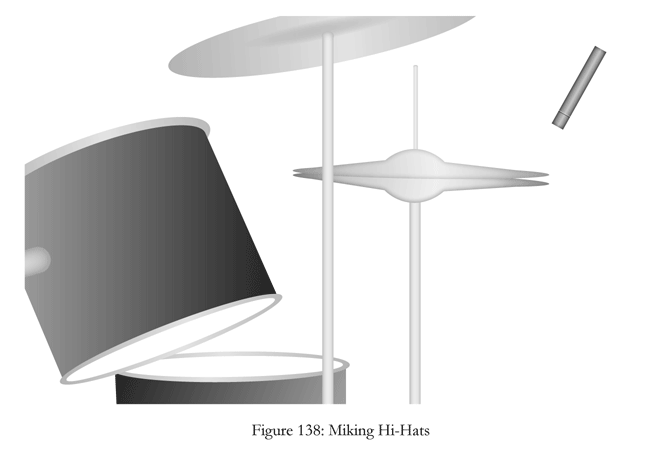
In many cases it is unnecessary to mic the hi-hat as it is often very present in the overheads. When a mic is needed on the hi-hat, a small diaphragm, or “pencil”, condenser can be placed above it at a distance of 3–4″ (see Fig. 138).
Cymbals
As with the hi-hat, cymbals are usually present enough in the overheads that miking them individually is not necessary. If individual mics are needed or desired, small-diaphragm condenser mics are usually a good choice. They can be placed at a distance of 3–4″, but clearance should be checked so they are not hit by a swinging cymbal.
Drum Overheads
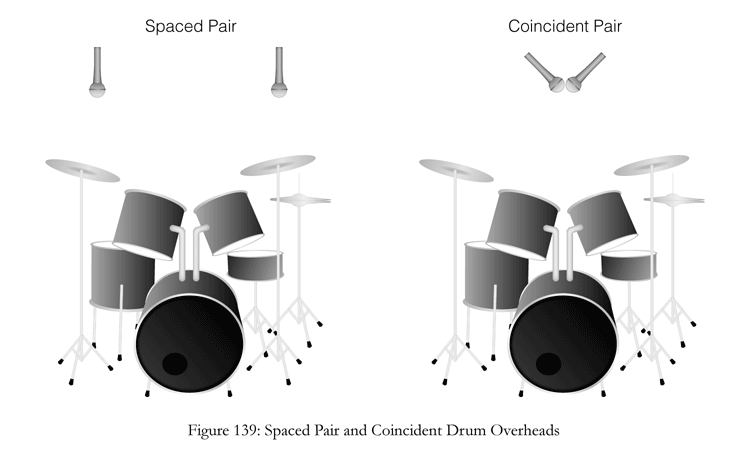
In a simple setup, a single overhead mic can be placed above the drummer’s head. A more interesting drum sound comes from a pair of overheads panned hard left and right to create a stereo drum sound. The two overhead mics should be the same make and model and have a cardioid pickup pattern. Small-diaphragm condensers are most common, though wide-diaphragm condensers are also a good choice.
Overheads can be set up as a spaced pair, with one mic over each half of the drum kit, or a coincident pair can be used in an X-Y pattern by placing the two mics together at a 90˚ angle to one another. The mic on the left will pick up the right side of the kit, and the mic on the right will pick up the left (see Fig. 139).
Distant Miking Drums
Experimenting with distant mics on a drum kit can yield big, fat drum sound. This can take some trial and error and is heavily affected by the acoustics of the room, but the results are often worth it. A few possibilities include:
- Mics placed at the other end of a large loading bay (or other large open space).
- Placing a mic down the hall from the kit.
- A mic placed at the the top of a tall stairwell when the drum kit is at the bottom.
- Mic placed on the other side of a closed door.
